A great goal that most people work up to in their flexibility is the splits. Being able fully do the splits is a great accomplishment and goal for anyone that is new to stretching. For me, this routine is about maintaining my flexibility rather than working towards it; so any level of stretching can try this routine and it will benefit. Also, lately I've been enjoying stretching outside because I think it's really a calm environment and the what stretches your muscles deeper. Well, I think that's enough chit-chat for now..let's get right into my daily stretching routine!

- Basic, standing stretches to warm up your body
I like to use my arms to help further this neck stretch, however it is optional and just for anyone that wants to feel a deeper pull in their neck. I usually hold each side for about 5 seconds and then finish off with 2 neck rolls to each side.


Now, these stretches above everyone has probably done in either gym class or a sport, but they're just basic arm stretches. I hold each side again for around 5 seconds, and then in between switching sides I give my arms a swing to loosen them up further.
2. Standing leg sequence to open up you're hips and legs
Works your: Hips, legs, [hamstrings, inner thighs], glutes, and obliques
I began standing tall, arms reaching out to both sides. Then I shifted just my waist to each side-making sure to not move my shoulders, really feeling the stretch in my obliques (side of stomach)


Next, I reached one arm over to one side tucking the arm of the side I was reaching towards under onto my opposite thigh. Making sure that my arm above me is staying in line with my body, not dipping in front of my face-forming a curve in my back, or dropping past my ear-forming an arch in my back.

Then, I pulled back twisting to the opposite side, arm that was reaching over my head above me and then went back to the side I started on, reaching arms out in a flat, table position. Hold this pose for a few breaths and then slowly stretch down to that side, pulling your nose to your knees.


Next, lift up your right arm (if your stretching to your right leg) and feel that deeper stretch, pulling your left ear towards your right leg and twisting up towards the sky in a full body bend. It's very important in this circuit that you keep your knees straight at all times. It doesn't matter if your nose can't touch your legs yet-that's what we're working up to. Repeat on the other side, holding each position as long as comfortable for you, and then finish off with a center stretch, trying to pull the top of your head through your legs and towards the ground.


The last part of this standing leg sequence is a very extreme stretch so only hold as long as you can bear, but this stretch will really open up your hips and allow you to stretch further in the rest of the routine.
So, begin in a deep plié, hands on knees, and toes pointing out to the sides. Be sure that your knees are right over your toes to prevent injuries. Hold this stretch for about 15 seconds (unless it's unbearable), trying to push your hips deeper to the ground with each exhale.
I like to then twist my shoulders towards the ground to open up both my back and shoulders.


This last bit is optional and is a more extreme version, for a greater stretch-placing elbows on knees and sinking hips down.
3. Lunging, leg sequence to entirely stretch out every part of your legs
Works your: Legs [every muscle], and hips
Right side! (Hold each position for 8 counts or more)
- Lunge - arms on either side of the foot, knee at a 90 degree angle, hips pressing down
- Staying at the same hip level, bring arms out to side and press hips down
- Then keeping arms out lift your legs up straight moving arms above head; repeat 5 times up/down
- Push up from beginning lunge so that your right leg is straight. Keep hips parallel-don't turn your hips to either side
- Flex right foot and bend back knee keeping right, front leg straight
- Next, press back into a lunge, this time with your left knee on the ground, hands on right leg. Make sure that your knee is not going over your toe! This should feel much more intense than the first lunge variation
- Then, lift your left leg up, twisting your body slightly and grabbing hold of the ankle feeling a strong upper thigh stretch
- Get back in to the first lunge and turn your body to the right side. This should feel awkward and incorrect at first..bend both knees so that your sitting with your right leg over your left and stretch out your back by pushing your right arm against the inside of your right knee
- Next, lift up your right leg and place it over your left sitting in a criss-cross position
- This stretch is hard so don't push it too far if you're a beginner. Reach arms forward and fold over leg feeling a pull on your outer thighs/side glute
- FINALLY, sit back into a lunge and this time turn to the left keeping right knee bent, and left leg pointing straight out and feel the inner thigh stretch.


Repeat everything on the left side!
4. 2 quick and fun double 'h' stretches: Hips & Hamstrings
The butterfly stretch 🐛
Feet touching and hips out to the side. Use your hands to press legs down towards the floor. Also, your feet don't have to be as close as mine are, you can move them out or in adjusting to your level of flexibility. I really enjoy this stretch so I usually hold it anywhere between 45 seconds & 1 minute and a half.


The pike stretch!
I have to be honest this is one of my least favorite stretches because I'm really tight in my hamstrings from running and this stretch directly targets those huge leg muscles. Don't be discouraged if you can't touch your toes-remember that's something to work for and if you practice each day you will be able to, it just takes time!
So, first I point my toes and pull my face into my knees keeping my legs straight for 30 seconds and then I flex my feet and pull my toes towards me keeping my back flat for another 30 seconds.


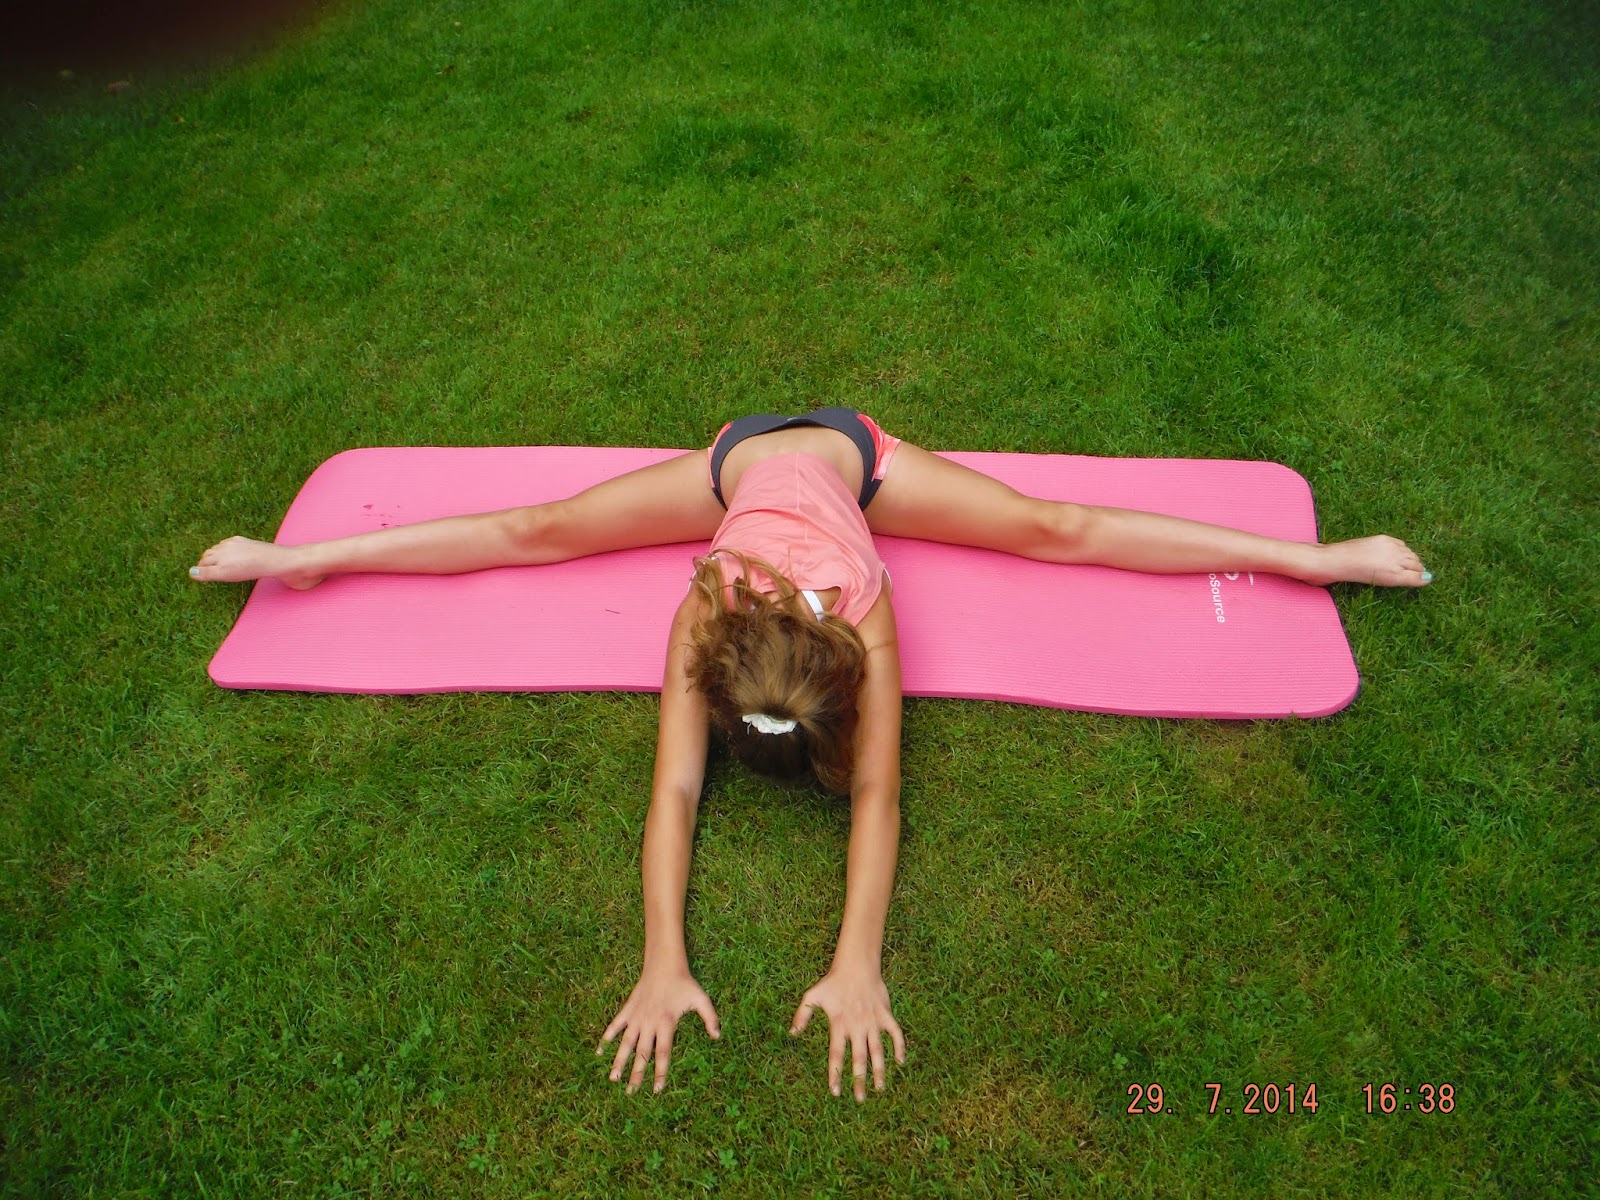
5. Straddle stretching sequence!
Works your: Inner thighs, obliques, hips
||Hold each position for a minimum of 10 seconds||
- Begin in a straddle position legs out as far as you can with thighs and butt touching the ground throughout the entire sequence. If you feel your legs ever starting to lift off the ground move your legs in closer to each other and continue
- Next, reach out to the side similar to the beginning stretch we did; except this time your sitting. Right arm is reaching to your foot staying over your ear throughout this hold
- Then, take both arms over onto your foot, pulling your stomach towards your knee


Other side! PS You're always going to have a better side so don't stress if one side is stretching out easier than the other. That's also why we need to make sure to equally stretch both sides, even though sometimes it's a lot easier if we just stretch the painless side.
6. Preparing for the splits! (Don't worry, we're almost to the end ;) )
Works your: Legs!
Alright, this next stretch will be the final straw to get you ready for...the SPLITS! It is basically like doing the splits on your back, so reverse splits. Except, I actually find this stretch harder than the splits so it will make going into splits hopefully seem better for you!
{Bend leg into chest->straighten leg up pulling to face->flex foot and bend knee at 90 degrees}: ---||Hold each pose for 20 seconds||


7. The dreaded, yet, kinda cool splits! {Center, left leg and right leg}
Works your: Glutes, legs, and hips
||Hold for 2-5 minutes each way||
So, before I explain to you all about the splits, I just wanted to give you a quick heads up. When you're looking at these photos of how to do each stretch I'm doing the advanced way. So, something to keep in mind is that I've been stretching since I was a baby, literally...I sat in my car seat or stroller and would have my leg behind my head just chillin :) On this note, don't be discouraged if you're going into your splits propped up on your elbows or hands with a lot of space between you and the floor. That's totally normal!
When going into these splits I advise you to start either standing up or on one knee and gradually sliding into this complex move, stopping when you feel TOO much pain. However, pain while stretching is normal and actually good, so don't limit how far you can push yourself. Just breath through the uncomfortableness until it wears off; and when it does this shows you that you just became that much more stretchy!! So, it doesn't matter how far down you get, if you're not doing the stretch properly, so make sure that your hips are parallel and pointing straight forward in your side splits. Then, in center splits make sure that your hips are right over your butt not leaning forward or backwards.
Center
Right side

Left side

8. Final back stretch to release all the tension and open up your body fully
Works your: Back & stomach
The cobra!
Lie on your stomach with your hands next to your shoulders and push up towards the sky, trying to keep your hips low to the ground, neck up, and arms straight. If this is too deep of a stretch you can bend your arms and move closer to the ground.
||Hold for 20-30 seconds||

Okay, this next stretch: The bridge, is one of the toughest stretches out of this whole routine. So, if you don't feel comfortable attempting it yet, don't! Just stick to the cobra and work up to it.
Or, if you want to do a less advanced version of the bridge..lie on your back, legs bent and push your hips up towards the sky.
Or, you can attempt the position below (Full bridge) extending both legs and arms up feeling a serious stretch in your stomach while also opening up your chest and shoulders.
||Hold as long as possible||

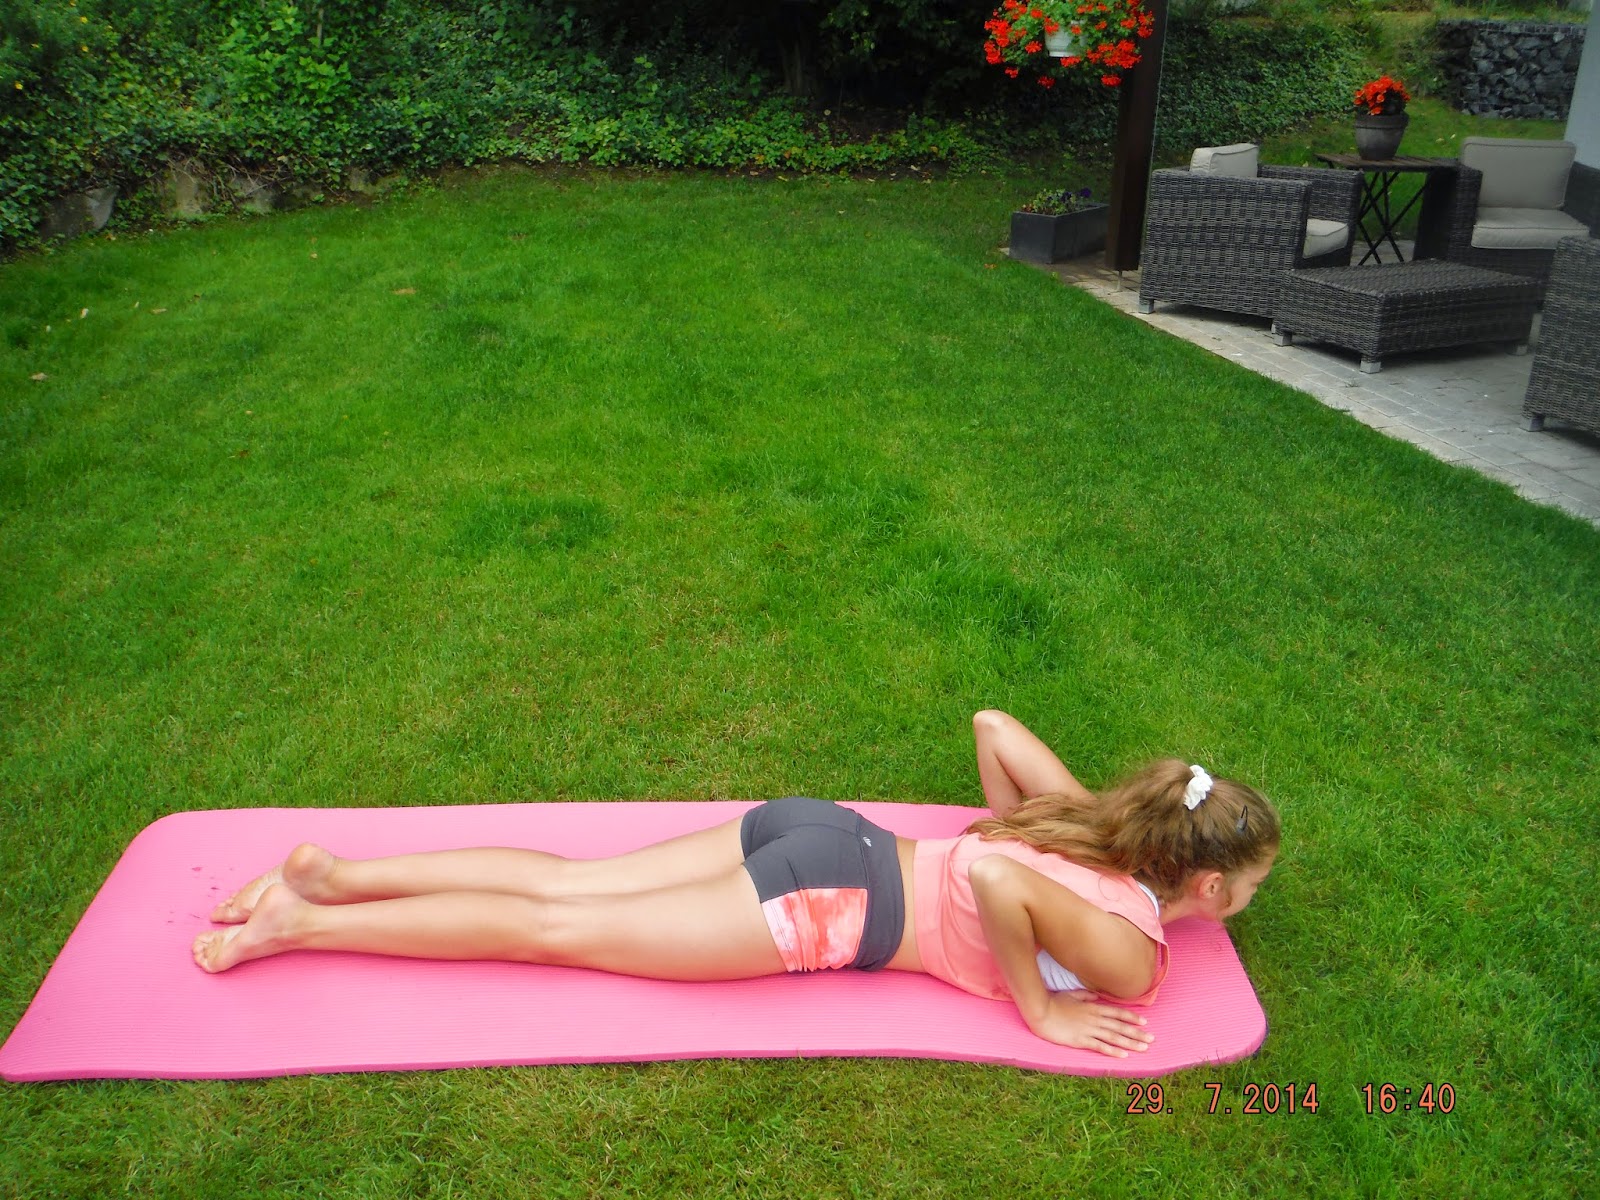
Finally, finishing with a counter-attacking move to make your back feel better after those hard back stretches: Child's pose 👶

Well, that's it! Put on your favorite music, roll out your yoga mat and get started! I hope that you guys enjoyed this stretching routine and that it will benefit you and make you more flexible! Whether you're a beginner or advanced, it doesn't matter! You can always push yourself more or ease up on the stretches for whatever works for you. So give this routine a try feeling how invigorating and satisfying stretching can be. Now a last word of advice to remember:
- It doesn't matter how far down you get in these stretches if you're not doing them properly and with the right form
- You're not going to be super flexible after doing this once...it takes determination & effort
- Push yourself, try your hardest and don't stop stretching until you've reached your goal!